


Photo by Christin Hume on Unsplash
Tutorial: Integrating Weaverse into Your Shopify Hydrogen Project
Learn how to integrate Weaverse into your Shopify Hydrogen project for a better, more customizable e-commerce experience.


Introduction
Are you working with Shopify Hydrogen and looking for a way to make your online store more customizable? Weaverse is here to help. It’s a tool that makes it easy for you and your clients to customize a Shopify store without needing to know how to code. Let’s go through the steps to integrate Weaverse into your Shopify Hydrogen project.
Why Weaverse?
Weaverse is great for when you’re building a Shopify store for clients who want a modern, easy-to-customize online store. Hydrogen’s tech is powerful, but it can be hard for clients to make changes by themselves. Weaverse makes this a lot easier.
Getting Started
First, let's set up your Shopify Hydrogen project. Open your command line and enter:
npm create @shopify/hydrogen@latest
After setting up, go to your Hydrogen project folder and start it with:
npm run dev
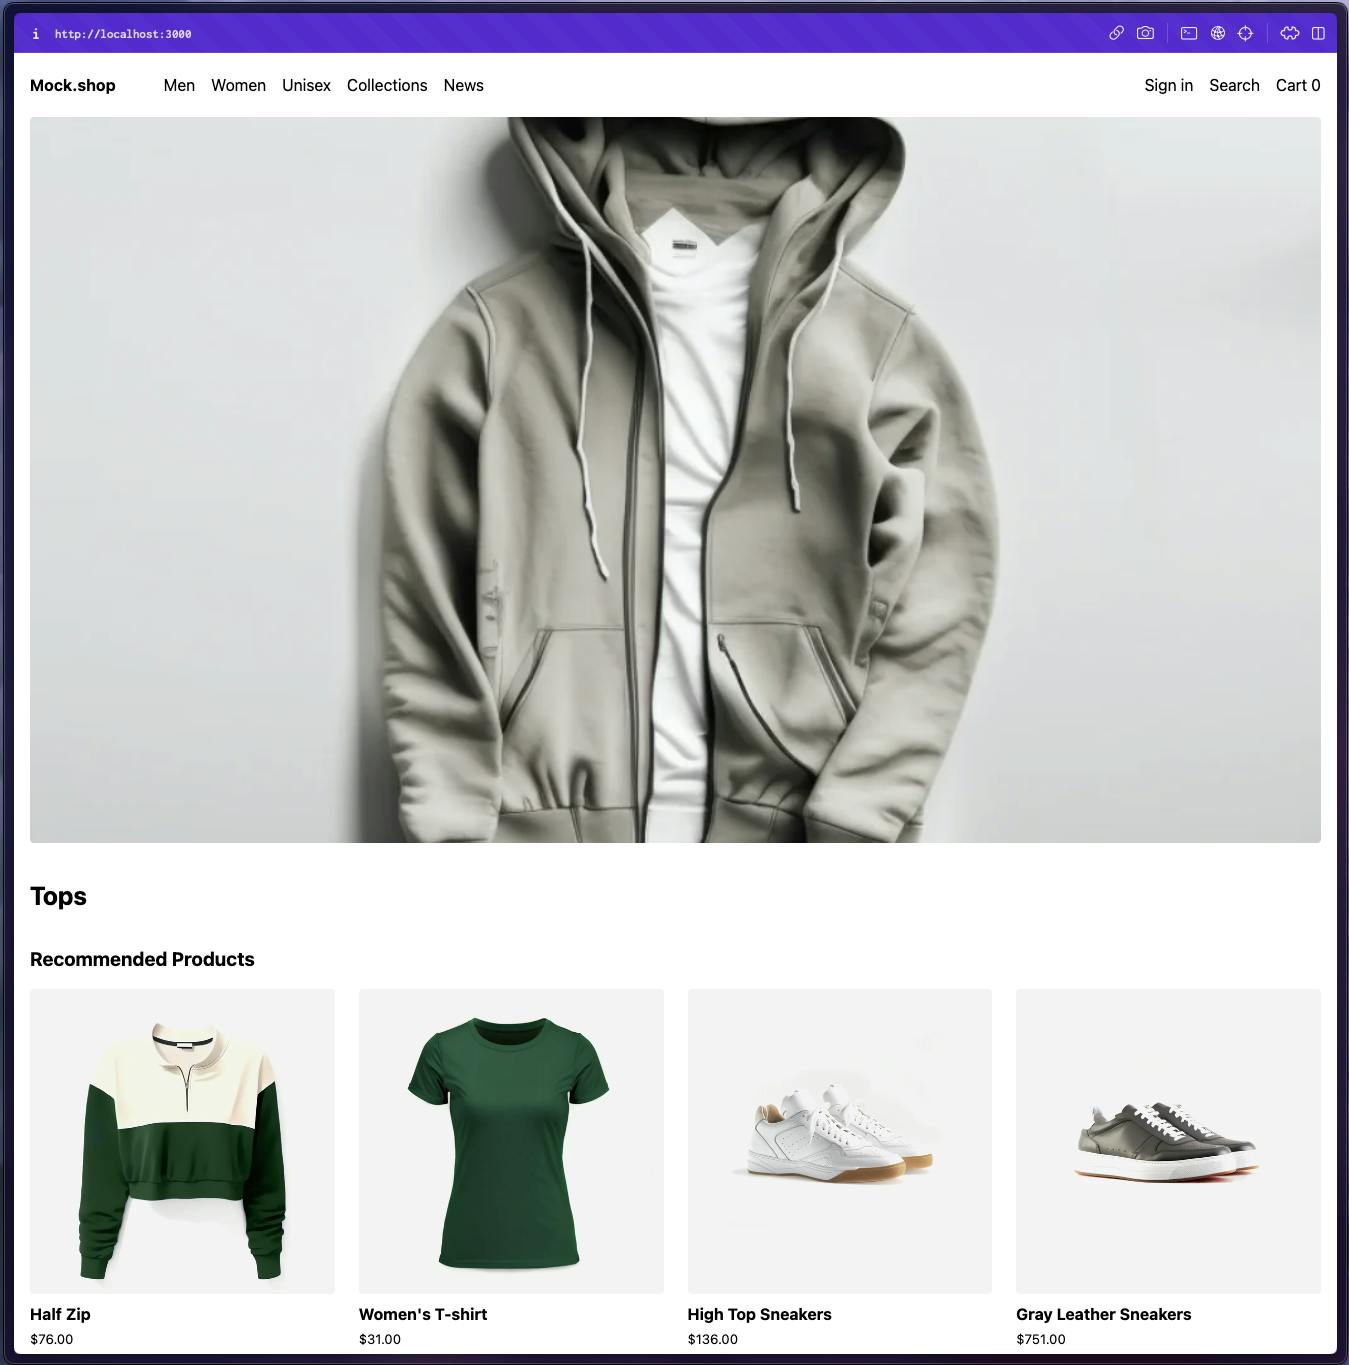
Now you will see your Hydrogen storefront running like this:
Integrating Weaverse: Step-by-Step
Step 1: Install Weaverse
Begin by adding Weaverse to your project. Enter the following command:
npm install @weaverse/hydrogen
Step 2: Create the Weaverse Directory
Next, you need to set up a directory for Weaverse in your project’s app folder. Create two files:
weaverse/component.ts – This file is for registering components in Weaverse. Start with an empty array.
// weaverse/component.ts

import type {HydrogenComponent} from '@weaverse/hydrogen';

export const components: HydrogenComponent[] = [];
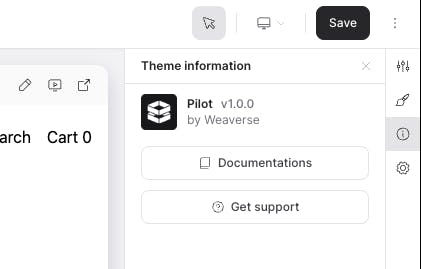
weaverse/schema.ts – This file is where you define Project/Theme information so that users can later find that information in the Project information section in the Weaverse app.
// weaverse/schema.ts

import type {HydrogenThemeSchema} from '@weaverse/hydrogen';

export const themeSchema: HydrogenThemeSchema = {
  info: {
    version: '1.0.0',
    author: 'Weaverse',
    name: 'Pilot',
    authorProfilePhoto:
      'https://cdn.shopify.com/s/files/1/0838/0052/3057/files/Weaverse_logo_-_3000x_e2fa8c13-dac2-4dcb-a2c2-f7aaf7a58169.png?v=1698245759',
    documentationUrl: 'https://weaverse.io/docs',
    supportUrl: 'https://weaverse.io/contact',
  },
  inspector: [

  ],
};
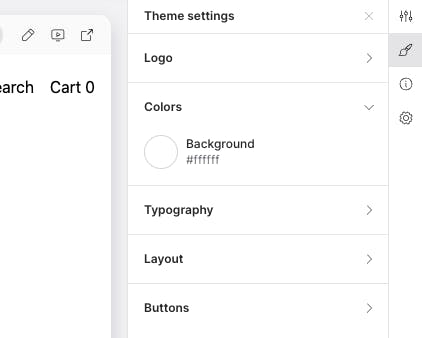
At the same time, this is also where you will define Global Theme settings, similar to how you use settings_schema.json in Dawn theme (Shopify theme). I have also left a few settings available so you can expand them later. Below is an example image of my theme settings:
Step 3: Set Up a Weaverse Client
Create a weaverse/weaverse.server.ts file. The “server.ts” extension indicates that the code within is intended for server-side execution. This distinction is crucial for maintaining a separation between server-side and client-side logic, ensuring better security and performance.
// weaverse/weaverse.server.ts

import type {WeaverseClientArgs} from '@weaverse/hydrogen';
import {WeaverseClient} from '@weaverse/hydrogen';
import {components} from '~/weaverse/components';
import {themeSchema} from '~/weaverse/schema';

export function createWeaverseClient(args: WeaverseClientArgs) {
  return new WeaverseClient({
    ...args,
    themeSchema,
    components,
  });
}

export function getWeaverseCsp(request: Request) {
  const url = new URL(request.url);
  // Get weaverse host from query params
  const localDirectives =
    process.env.NODE_ENV === 'development'
      ? ['localhost:*', 'ws://localhost:*', 'ws://127.0.0.1:*']
      : [];
  const weaverseHost = url.searchParams.get('weaverseHost');
  const weaverseHosts = ['weaverse.io', '*.weaverse.io'];
  if (weaverseHost) {
    weaverseHosts.push(weaverseHost);
  }
  return {
    frameAncestors: weaverseHosts,
    defaultSrc: [
      "'self'",
      'cdn.shopify.com',
      'shopify.com',
      ...localDirectives,
      ...weaverseHosts,
    ],
    imgSrc: [
      "'self'",
      'data:',
      'cdn.shopify.com',
      ...localDirectives,
      ...weaverseHosts,
    ],
    styleSrc: [
      "'self'",
      "'unsafe-inline'",
      'cdn.shopify.com',
      ...localDirectives,
      ...weaverseHosts,
    ],
    connectSrc: [
      "'self'",
      'https://monorail-edge.shopifysvc.com',
      ...localDirectives,
      ...weaverseHosts,
    ],
  };
}
In this file, you’ll include:
createWeaverseClient: For interacting with the Weaverse API.getWeaverseCsp: For managing content security policies, ensuring your app adheres to best practices in web security.
Step 4: Render Weaverse Content
Add a weaverse/index.tsx file to render Weaverse content. This file acts as a bridge between your Shopify Hydrogen project and the dynamic content managed through Weaverse.
// weaverse/index.tsx

import {WeaverseHydrogenRoot} from '@weaverse/hydrogen';
import {components} from './components';

export function WeaverseContent() {
  return <WeaverseHydrogenRoot components={components} />;
}
Completing the Integration
Once you've set up the necessary files, it's time to fully integrate Weaverse into your Hydrogen project:
Integrating weaverse in Remix's Global Context
In your server.ts file, incorporate weaverse into Remix's global context. This is done by defining weaverse in the fetch handler of Remix, ensuring it's accessible throughout your application. This step is crucial for making sure Weaverse functions correctly within your project.
// server.ts

// ...
import {createWeaverseClient} from '~/weaverse/weaverse.server';
// ...

/**
* Create Hydrogen's Storefront client.
*/
const {storefront} = createStorefrontClient({/** ... */ });

const weaverse = createWeaverseClient({
        storefront,
        request,
        env,
        cache,
        waitUntil,
});


/**
* Create a Remix request handler and pass
* Hydrogen's Storefront client to the loader context.
*/
const handleRequest = createRequestHandler({
        build: remixBuild,
        mode: process.env.NODE_ENV,
        getLoadContext: () => ({
          session,
          storefront,
          cart,
          env,
          waitUntil,
          weaverse, // add weaverse to Remix loader context
        }),
});
TypeScript Error Handling: If you encounter a TypeScript error like TS2739, indicating that Type Env is missing properties from type HydrogenThemeEnv, don't panic. Simply add the missing properties to HydrogenThemeEnv in your remix.env.d.ts file. This step ensures your TypeScript environment recognizes the new Weaverse elements.
declare global {

    /** ... */

    /**
   * Declare expected Env parameter in fetch handler.
   */
  interface Env {

    /** ... */

    WEAVERSE_PROJECT_ID: string;
    WEAVERSE_API_KEY: string;
  }
}
Also, define weaverse in the AppLoadContext interface to ensure it's recognized as part of your application's context.
declare module '@shopify/remix-oxygen' {
  /**
   * Declare local additions to the Remix loader context.
   */
  export interface AppLoadContext {
    env: Env;
    cart: HydrogenCart;
    storefront: Storefront;
    session: HydrogenSession;
    waitUntil: ExecutionContext['waitUntil'];

    weaverse: WeaverseClient;
  }

  /** ... */
}
Implementing getWeaverseCsp
Open your app/entry.server.tsx file and utilize the getWeaverseCsp function. This function is crucial for managing your content security policy, which is a key aspect of web application security.
// app/entry.server.tsx

// ...
import {getWeaverseCsp} from '~/weaverse/weaverse.server';
// ...

const {nonce, header, NonceProvider} = createContentSecurityPolicy(
    getWeaverseCsp(request),
);
Updating app/root.tsx for Weaverse Theme Settings
In the app/root.tsx file, add weaverseTheme data to the loader function’s return value. This addition is vital for enabling Weaverse theme settings within your application.
// app/root.tsx

export async function loader({context}: LoaderFunctionArgs) {

  /** ... */

  return defer(
    {
      /** ... */
      weaverseTheme: await context.weaverse.loadThemeSettings(),
            /** ... */
    },
    {headers},
  );
}
Next, wrap your App component with the withWeaverse function. This wrapping is necessary because withWeaverse provides your App component with the Global Theme Settings Provider that you can use everywhere from the App context.
function App() {
  const nonce = useNonce();
  const data = useLoaderData<typeof loader>();

  return (
    <html lang="en">
      /** ... */
    </html>
  );
}

export default withWeaverse(App);
Handling Remix Routes for WeaverseContent
For rendering WeaverseContent on routes, include weaverseData in the return result of the loader function. This ensures that the dynamic content from Weaverse is properly loaded and displayed on each route.
// app/routes/_index.tsx

/** ... */

import {WeaverseContent} from '~/weaverse';


export async function loader({context}: LoaderFunctionArgs) {
  const {storefront} = context;
  const recommendedProducts = await storefront.query(
    RECOMMENDED_PRODUCTS_QUERY,
  );
    /** ... */
  return defer({
    recommendedProducts,
    weaverseData: await context.weaverse.loadPage(),
  });
}

export default function Homepage() {
  return (
    <div className="home">
      <WeaverseContent />
    </div>
  );
}
In your route components, explicitly render WeaverseContent. This direct rendering allows for the customized content to be displayed as intended.
Migrating Components to Weaverse
Begin migrating your default components to Weaverse Components. This migration will enable these components to utilize the dynamic customization features provided by Weaverse.
Connecting to Weaverse CMS
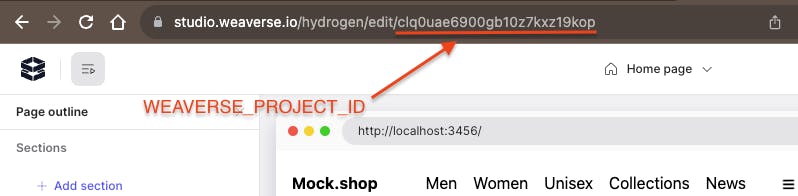
Ensure the Weaverse Hydrogen app is installed in your Shopify store. Create a storefront, copy the Weaverse Project ID, and add it to your Hydrogen project's .env file. This step connects your project with the Weaverse CMS.
Now start the development server and update the Preview URL in Weaverse Project settings. By default, our Weaverse projects are set to http://localhost:3456.
# .env

SESSION_SECRET="foobar"
PUBLIC_STORE_DOMAIN="mock.shop"
WEAVERSE_PROJECT_ID="your-project-id-here"
Once saved, you should see your Hydrogen page loaded in Weaverse Studio.
Customizing Sections with Weaverse
Begin by creating a recommended-products.tsx file in the app/sections folder. Adapt the original RecommendedProducts component to a forwardRef component. This adaptation allows Weaverse Studio to identify and edit the component more easily.
// app/sections/recommended-products.tsx

import {forwardRef} from 'react';
import {Link, useLoaderData} from '@remix-run/react';
import {Image, Money} from '@shopify/hydrogen';

const RecommendedProducts = forwardRef<HTMLDivElement, {productsCount: number}>(
  ({productsCount}, ref) => {
    const {
      recommendedProducts: {products},
    } = useLoaderData<any>();
    const displayProducts = products.nodes.slice(0, productsCount);
    return (
      <div className="recommended-products" ref={ref}>
        <h2>Recommended Products</h2>
        <div className="recommended-products-grid">
          {displayProducts.map((product: any) => (
            <Link
              key={product.id}
              className="recommended-product"
              to={`/products/${product.handle}`}
            >
              <Image
                data={product.images.nodes[0]}
                aspectRatio="1/1"
                sizes="(min-width: 45em) 20vw, 50vw"
              />
              <h4>{product.title}</h4>
              <small>
                <Money data={product.priceRange.minVariantPrice} />
              </small>
            </Link>
          ))}
        </div>
        <br />
      </div>
    );
  },
);

export default RecommendedProducts;

export const schema = {
  type: 'recommended-products',
  title: 'Recommended products',
  inspector: [
    {
      group: 'Settings',
      inputs: [
        {
          type: 'range',
          name: 'productsCount',
          label: 'Number of products',
          defaultValue: 4,
          configs: {
            min: 1,
            max: 12,
            step: 1,
          },
        },
      ],
    },
  ],
};
And the result:
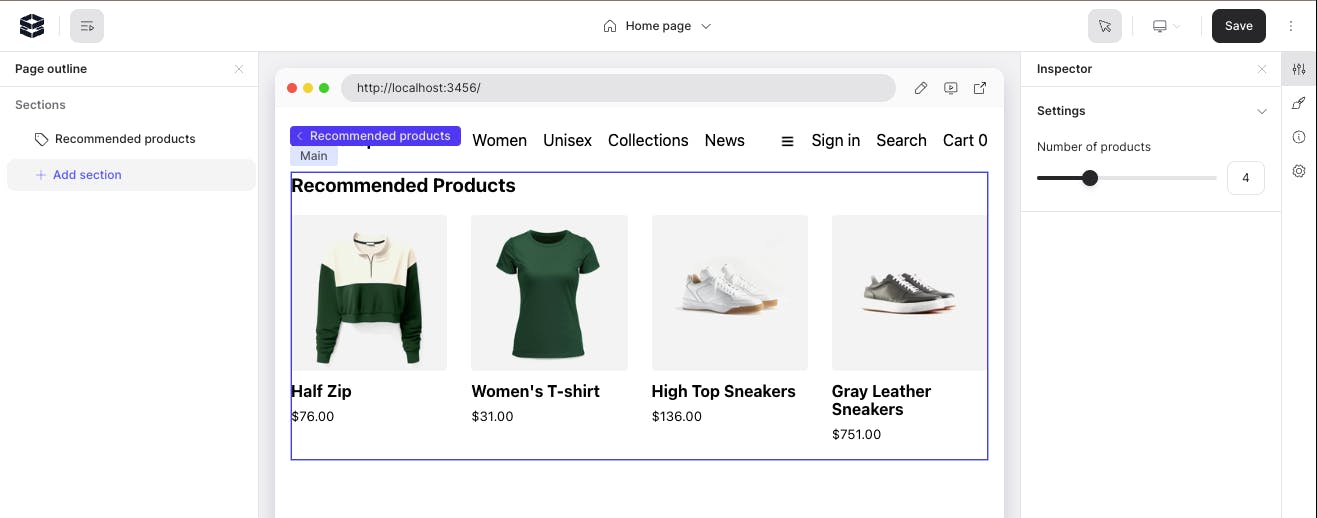
That concludes our basic tutorial on integrating Weaverse with your Shopify Hydrogen project. Keep an eye out for our next blog, where we'll delve into more advanced features like using schema, loaders in Weaverse Components.
References:
Demo repository: https://github.com/Weaverse/Naturelle
Documentation: https://weaverse.io/docs/migration/8384952-migrating-hydrogen-project-to-weaverse